Tuesday, January 30, 2018

Figures

I'm not going to share every single exercise, in my online course, because some are more about experiments, than producing anything notable. Which is a great way to learn - through experimentation!

Nevertheless, this week, we're learning all about people, or figures - and how to bring them into being. I didn't realise there were so many creative ways to do this. I will share, two of the different ways we experimented with - and they're really, worlds apart.


Experiment #1


One of the exercises, had to do with exploring light and dark tones, specifically through paint. Using a naked model: we could opt for the female image supplied, or find our own. So I opted to find my own image, using a male model instead (above).

It was not my intention to give him, a "Wolverine knives" look to his hands, but I was experimenting with mark making, and trying to distract from the incomplete hands. As he was holding something in both hands, in the reference image. So I had to fudge his hands a little, in order to lose the items.

But then, we later came to do an exercise, which truly excited me...


Experiment #2 begins


This time, we were going to create figures from thin air. We could use a reference image for guidance, if we wanted to - but I was curious to see how I would go, with just my imagination, and the materials I chose.

Personally, I love incorporating newspaper prints in some of my work, through collage. And I found an awesome hand-written letter page, as my base material.


Two random pieces


I tore it up randomly, and started gluing it to my white paper. I had an idea of the figure's position on the page (conjured up in my imagination) but I was also prepared to see what would randomly appear, too.


Six random pieces


I thought this had the good basis for a seated, or crouched position. But at this stage, I still hadn't settled on the final position of the figure. It was still just an idea, forged out of random pieces of paper. Then I started adding the paint...


Acrylic Paint


This, again, was a random process. I liked the rust-coloured look, that yellow-oxide and red, made together. I also thought it complemented the vintage look of the hand-written prints, more than a more bold colour would.

To help in blending and highlighting though, I added a fair bit of white gesso.  Ever so gradually, a figure started to emerge...


Titled: "Mc Kenna Replies"
{Mc Kenna, being the surname, written on the envelope}


I decided to keep it more abstract, giving the illusion of a position, without locking it into one. My figure could've been in a crouched position, or standing on one leg.

This is the most abstract, I've gotten in this course. And it didn't make me feel uncomfortable either. Maybe because I didn't have a reference image to compare it to - did I get the proportions right, is the shading correct, etc. This was just a random process, to see what emerged.

I probably could've worked on it more, but I loved the weightless feeling to this painting - a lot more, than the heavy feeling, of the first. I didn't want to lose that, so stopped. I'm definitely going to try more of these.


Sunday, January 28, 2018

Splash of colour

For the final project of the week, I was very happy to come back to reality! While an exploration of marks, was just as desirable as deviating from normal colour profiles - I only wanted the colour deviation. Illustration wise, I wanted to return a little more, to my comfort zone again - realism.

It gave me the opportunity to use one of my favourite colours though, - lime green! Now I just had to find, a suitable reference image...


Source image - free download


I ventured to Pexels.com, for photographic inspiration. Luckily I found some, in an adorable moggy! It helped, to go with a monochrome picture, so I wasn't tempted to veer into original colour territory.

I wasn't necessarily looking for a cat, they just popped-up in the feed, and too damn cute to pass by!


 Initial sketch


Rough sketch in charcoal, first. Then my lime-green, soft pastels went down. I've learned, it's easier to start with a light application of charcoal, then put as much of your soft pastels down, as possible. Only then, do you go in with a heavy application of charcoal, for shading, afterwards.

If you go in hard, with the charcoal first, all your pastels will have a black tinge, where they come in contact with the charcoal. So the dark shading in charcoal, was the final application to go down.


Title: Techno-Cat


I really loved how the lime green, orange and yellow went together. While picking the colours was completely intentional, I didn't know how they would look together, until it was done. The yellow and green, gave the moggy an almost fluorescent appearance. Which was perfect for the name I chose. Techno-Cat.

They look like they're resting in the lights of a rave party. David said perhaps it should have more of a smile on it's face. But I think if I were a moggy, trying to get some rest at a rave party, I'd be pretty annoyed by the bright colours and noise too!

Once again, I loved this exercise for experimentation, and ultimately, story telling. Doing something different to a realistic picture, begs to ask the question - what's going on here? Which is true of abstract art, in general. My work is not exactly, abstract yet. But I'm getting there, one exercise at a time!


Saturday, January 27, 2018

Abstract Exercise

I've got to say, I'm really enjoying my Abstractify course. It always challenges me to think about how I approach a picture, or drawing. Although, the optional abstract exercise, recently, didn't exactly lead to enticing pictures.


I decided to merge my photo of gum nuts, and a magazine cover I quite liked - involving brightly coloured, Chinese lanterns. Although it sounded like a good idea in my head, I wasn't quite able to master the exercise in practice.


Not in oil pastels...


Nor in acrylic paints - the first attempt...


Or even the second and final attempt, in acrylic!


But the exercise, no matter how unsatisfactory the end pictures were, brought about some really valuable discoveries for me.

1. I don't like harsh lines when painting. It works with sketches only.
2. I really suck at making abstract art!

I dealt with the harsh lines, by trying to paint the whole picture with my fingers instead.


Some aspects of the final picture, worked in isolation. It seemed impressionistic, and got rid of those nasty, harsh lines. But as a whole, the final picture, was really quite unappealing.


Compared to the gum-nuts I painted earlier, it just didn't work. After some feedback from the course creator, I came to understand, I'm navigating between representational and abstract - I have to find the level which most appeals, to me.

On a spectrum, I lean more towards realism (representational) and less towards abstract. But as I practice more and more, that may change. I'm happy to accept realism for now, as it gives me a direction. Something I'm already connected to. Abstract will come more, later. I don't have to go full-abstract now. 

Which really helped, when I completed my final exercise for the week. More on that tomorrow.


Thursday, January 25, 2018

Line variations

 
Exercise 1


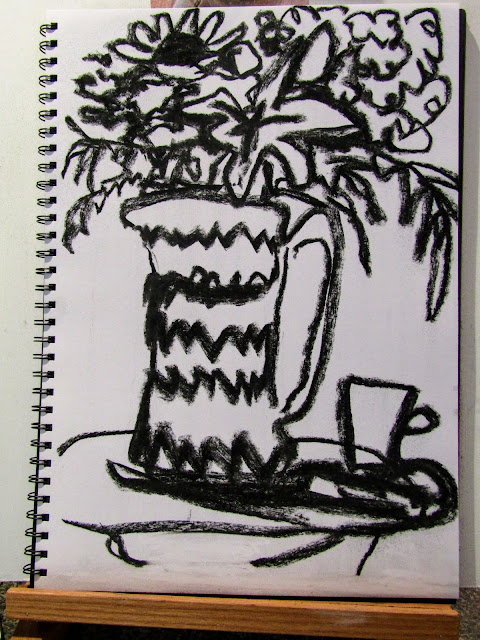
More exercises on exploring mark making, only by using a different medium this time: Charcoal. Unfortunately, I still haven't bought willow charcoal. So I was limited to chunky IXL blocks, made of charcoal, instead. Which I happen to love using, but they don't have a lot of line variation. It's chunky, or it's mostly chunky.

I may do these exercises again, once I get some proper willow charcoal.


 Exercise 2


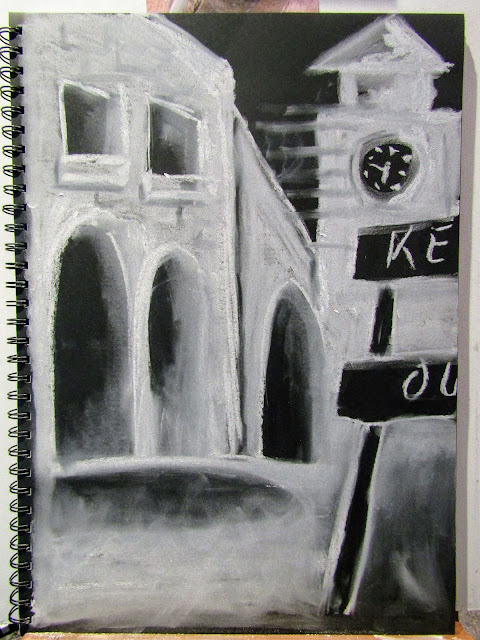
There are numerous ways to represent images, via different line making. We had to explore what we were capable of. I actually strayed a little from the exercise, in that I decided to use a black and white, alternating sketch book. Which worked well, with my black and white IXL charcoal blocks.

White charcoal? Is there such a thing? Not really. IXL blocks are a composite of charcoal and other ingredients, which is why they range from black, to white and a few other, natural colours, in between.


Exercise 3


We even played around with natural disadvantages, effecting how the lines could be drawn on the page. Which is why this one looks all wobbly. It creates different marks, when deliberately creating obstacles between you and the page.

While the above sketch is not my favourite to look at, I appreciate the different effects it creates. I can change how I make my marks, if I want to.


Exercise 4 (start)


The final exercise, was the most challenging! We had to take an initial sketch from the reference image we had, and turn it into something else. The geometric shapes in my initial sketch, called "city-scape", to me.

Was it? Not sure. It kind of looked like one. So I gave it a try!


Exercise 4 (finish)


It looked more like a ghost town, afterwards! I'm finding in all these exercises though, it's more about practicing mark making, than it is about the "completed" work. Which is challenging for me, who harks from a background of representational art. Or Illustrations. So starting without a goal in mind, doesn't feel natural at all!

Yet it's exciting and strangely addictive, to continue pushing myself, outside my own comfort zone. It's like having to unlearn, what I have learned. It feels like I'm constantly fumbling too. I'm okay with that however, because I want to learn new things.


Abstractify

I've been plodding along on my little creative blog, over the years...but that's about to change. With my youngest now in school, I'm able to focus a lot more on my creative endeavours. So be prepared for more blog posts!

Right now though, I'm doing an online art course, run by Tara Leaver, called Abstractify. It will get me back into the swing of creating.


 Lesson 1


I don't want to share the details of the course, but I will share the impact it's having on my own style. As well as the works I create, as a result. This is, after all, a new journey for me and I want to take you on it.

Above is an exercise in making marks. It took me outside my comfort zone,  because it was so random. The instructions in this exercise, contradicted, every approach I normally like to take, painting. But after getting over the initial discomfort, and what felt like a lot of mess - it eventually taught me something.


 Best take-away from exercise.


The above frame, was pointed out later, as being reminiscent of French Riviera. It was feedback from the course creator. Yet it completely missed my radar. I actually thought it looked too simple for my tastes. I normally use a lot more of details.

But that's precisely why I'm doing this course. To be able to express myself more freely, and loosely. Somehow I'd reached that benchmark already, without realising it! I was grateful, to have it pointed out later, because I was stuck in my past way of doing things. If I hadn't been prepared to feel uncomfortable though, and push through, regardless - I never would've appreciated the mystery of mark making! 


 Titled: "You-eclipsed-us"


After the first two lessons, I was inspired enough to paint something for myself. In this case, gum nuts from our property. I took the reference photograph, in 2011, or the year of the big flood. It was fun to paint this picture, without feeling I had to get everything right. It was meant to be "representational", not identical to the source image.
   
I'm having fun doing this course, and really glad I signed up. It goes for about a month, and I'm happy to share how it adds to my creative journey.